

Creating a blog post can take much longer when you do not have a clear process. You may spend time searching for topics, changing your outline, editing the same sections, or wondering what to do next.
A blog content workflow gives you a simple system to move from an idea to a published article. It helps you organize research, writing, editing, SEO, images, links, and publishing without starting from zero every time.
In this guide, you will learn how to build a practical blog content workflow that saves time, keeps your tasks organized, and helps you publish useful content more consistently.
What Is a Blog Content Workflow?
A blog content workflow is the process you follow to create and publish a blog post.
It can include:
- Finding content ideas
- Researching topics
- Choosing keywords
- Checking search intent
- Creating an outline
- Writing the article
- Editing the draft
- Optimizing the content
- Adding images
- Adding links
- Publishing the post
- Promoting the article
- Reviewing its performance
The exact process can be different for every blogger.
However, the main purpose stays the same: create a repeatable system that makes content creation easier.
Instead of asking what to do next, you already have a clear path.
Why You Need a Blog Content Workflow
Writing without a process can create unnecessary work.
For example, you may start writing before researching the topic. Later, you may discover that the article does not match search intent. As a result, you need to rewrite large sections.
A workflow helps you avoid this problem.
It can help you:
- Save research time
- Reduce repeated tasks
- Organize your ideas
- Create better outlines
- Improve content quality
- Keep SEO tasks organized
- Publish more consistently
- Make editing easier
A good workflow also makes it easier to work on several articles without losing track of their progress.
Set Clear Content Goals
Before you start writing, decide what you want the article to achieve.
Your goal could be to:
- Answer a common question
- Attract organic traffic
- Educate beginners
- Generate leads
- Promote a service
- Build authority
- Support another article
- Help readers take a specific action
For example, a beginner-friendly SEO article may aim to attract readers who are learning about search optimization.
A service-related article may instead focus on generating inquiries.
Therefore, the goal should guide the topic, format, and call to action.
Collect and Organize Blog Ideas
The next part of your workflow is collecting ideas.
Do not rely on memory. Create one place where you can save useful ideas whenever they appear.
You can collect ideas from:
- Keyword research
- Google searches
- Reader questions
- Social media comments
- Competitor research
- Customer conversations
- Industry discussions
- Your own experience
For example, if you run a blogging website, you might collect ideas such as:
- How to start a blog
- How to find blog topics
- How to create a content calendar
- How to improve blog SEO
- How to write better introductions
Later, you can review these ideas and choose the strongest ones.
A simple content idea list prevents you from starting every week with a blank page.
Research Topics and Keywords
Once you select an idea, research it before writing.
Start by understanding the topic itself. Then, look for keywords and related searches.
Check:
- What people search for
- Related questions
- Search intent
- Existing search results
- Common topics covered by competitors
- Information that may be missing
For example, if your topic is “blogging for beginners,” search for related questions that beginners may have.
You can also use keyword research tools to find related search terms.
Your keyword research guide can help you build this part of the process.
Do not stop at search volume. Relevance and search intent should also guide your decisions.
Create a Content Brief
After research, prepare a short content brief.
A brief gives your article a clear direction before you begin writing.
Include:
- Target audience
- Main topic
- Focus keyphrase
- Related keywords
- Search intent
- Article goal
- H2 and H3 ideas
- Questions to answer
- Internal links
- External sources
- Image ideas
For example, if you are writing for beginners, your brief should remind you to use simple explanations and practical examples.
This small planning step can save time later.
For a detailed approach, read How to Create an SEO Content Brief.
Write Your Blog Post
Once your brief is ready, start writing.
Begin with the introduction. Explain the reader’s problem and tell them what they will learn.
Then, follow your planned structure.
While writing:
- Keep paragraphs short
- Use clear headings
- Explain difficult terms
- Add practical examples
- Use simple language
- Stay focused on the topic
Do not try to make every sentence perfect during the first draft.
Instead, focus on getting the main ideas onto the page.
You can improve the wording during editing.
This approach can make writing faster because you are not stopping after every sentence to make small changes.
Edit and Improve Your Draft
Editing is a separate stage from writing.
After finishing the first draft, read the article again with fresh eyes.
Check for:
- Repeated ideas
- Unclear sentences
- Spelling mistakes
- Grammar problems
- Missing information
- Long paragraphs
- Weak transitions
- Unnecessary sections
Also check whether the article actually answers the question it promises to answer.
If a section does not help the reader, shorten it or remove it.
A good edit can often improve an article more than adding another paragraph.
Optimize Your Content for SEO
After editing, complete your SEO work.
Check the following:
- Focus keyphrase
- SEO title
- Meta description
- URL slug
- H1
- H2 and H3 headings
- Internal links
- External links
- Image alt text
- Search intent
Use the focus keyphrase naturally.
Do not repeat it in every paragraph. Instead, use related terms where they make sense.
For more page-level guidance, read On-Page SEO: A Beginner’s Guide.
SEO should support the reader rather than make the article difficult to read.
Add Images and Internal Links
Visuals can make your content easier to scan.
Before publishing, add useful images that support the topic.
For example, a blog workflow article could include:
- A content workflow diagram
- A keyword research visual
- A writing process graphic
- A publishing checklist
- A content planning calendar
Write descriptive alt text for each image.
You should also add internal links to relevant pages on your website.
For example, this article can connect to:
- Keyword research
- Content strategy
- SEO content briefs
- Content calendars
- Content refresh
- SEO guides
Internal links help readers discover related information and create stronger connections between your pages.
Create a Publishing Checklist
Before publishing, use a simple checklist.
Check that:
- The article has one H1
- The introduction is clear
- Headings are organized
- The focus keyphrase is used naturally
- The SEO title is ready
- The meta description is ready
- The slug is clear
- Internal links work
- External links work
- Images are added
- Alt text is added
- Formatting looks correct
- The article works well on mobile
- The call to action is clear
A checklist reduces small mistakes.
It also makes your workflow repeatable.
Promote Your Published Content
Publishing should not be the final task.
Once the article is live, share it with your audience.
Depending on your website, you can use:
- Relevant communities
- Social media posts
You can also repurpose the article.
For example, one blog post can become:
- Several social posts
- A short video
- An email
- A checklist
- An infographic
This gives one piece of content more opportunities to reach readers.
Review and Update Your Workflow
Your workflow does not need to stay the same forever.
After publishing several articles, look at where you spend the most time.
Maybe research takes too long. Perhaps editing is slow. You may also notice that you repeatedly forget image preparation or internal links.
Once you identify the problem, improve that part of the process.
For example, you could create:
- A reusable content brief
- An SEO checklist
- An image checklist
- A publishing template
- A content calendar
- A standard editing process
Small improvements can save a lot of time when you repeat them for every article.
Common Blog Workflow Mistakes
Starting Without Research
Writing before understanding the topic can lead to weak or unfocused content.
Doing Everything at Once
Researching, writing, editing, and SEO at the same time can slow you down.
Keep these tasks as separate stages.
Skipping the Content Brief
A short plan can prevent major changes later.
Ignoring SEO Until the End
SEO works better when it is considered during topic selection and planning, not only after writing.
Publishing Without Checking
Small mistakes in links, images, titles, or formatting can affect the reader experience.
Trying to Publish Too Often
Consistency is more useful than an unrealistic publishing schedule.
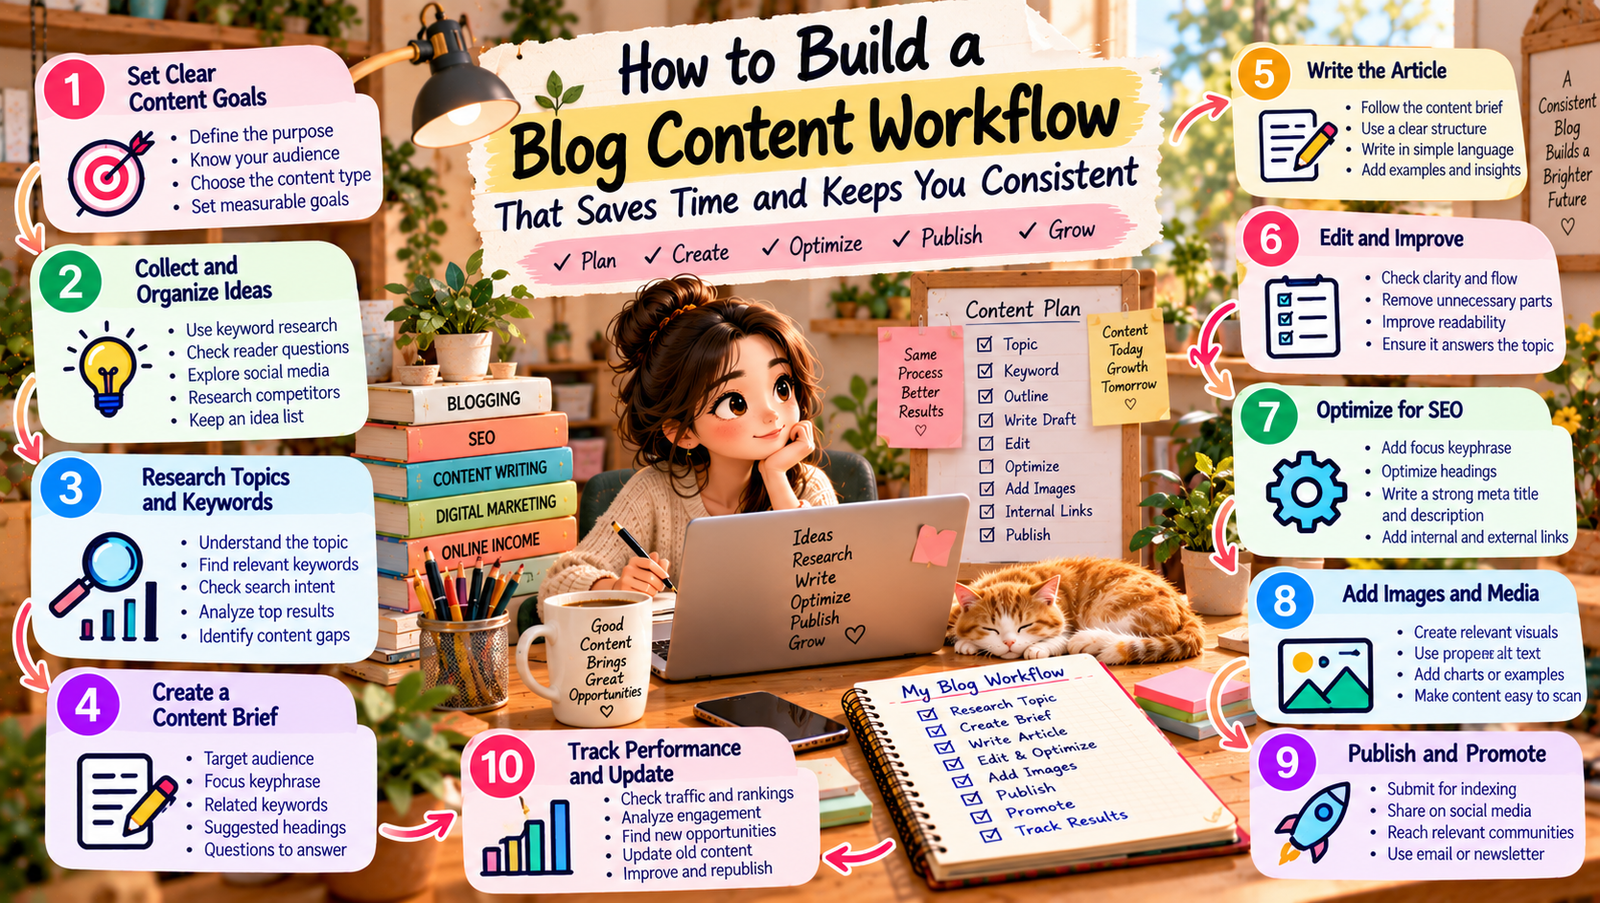
A Simple Blog Content Workflow
A practical workflow can be simple:
Idea → Research → Brief → Write → Edit → SEO → Images → Links → Publish → Promote → Review
Start by collecting useful ideas. Then research the topic and choose the best search terms.
Next, create a short brief and write the first draft. After that, edit the article and complete the SEO work.
Add images and internal links before publishing. Once the article is live, promote it and review its performance later.
This process gives every article a clear path from the first idea to future improvement.
A good blog content workflow does not have to be complicated.
The main goal is to create a repeatable process that helps you move from an idea to a useful published article.
Start with clear goals. Then research your topic, create a brief, write the draft, and edit it carefully. After that, complete your SEO work, add images and links, and use a publishing checklist.
Finally, review your results and improve the workflow when needed.
With a clear system, you can spend less time wondering what to do next and more time creating content that helps your readers.
[…] For more information, see how to build a blog content workflow. […]
A well-organized blog content workflow can make content planning and writing much easier. 😊